In my last blog post I explained how to use Percona ClusterControl to create a new Percona XtraDB Cluster from scratch. That’s a good option when you want to create a testing environment in just some mouse clicks. In this case I’m going to show you how to add your existing cluster to Percona ClusterControl so you can manage and monitor it on the web interface.
The environment will be pretty similar, we will have UI, CMON and 3 XtraDB Cluster nodes. The cluster should be already running and Percona ClusterControl also installed.
Adding an existing Cluster
The ClusterControl web interface is empty, there are no clusters on it. To add an existing one we need to click on “Add existing Galera Cluster.” (Click on the image for an enlarged view).


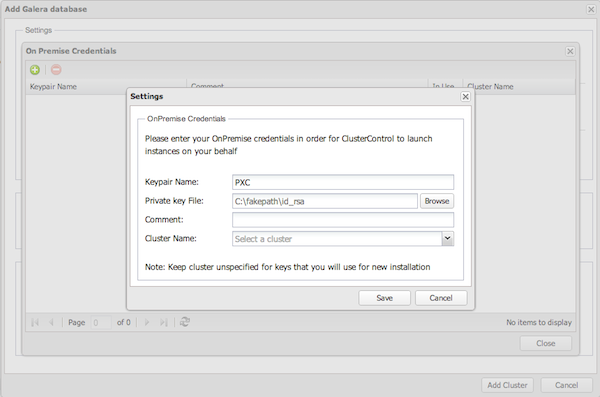
It is also necessary to add the private key in the web interface. You can do it using the form shown after clicking on “Add Key Pair”:
Once the key is added, we can verify the access:

As we can see here, everything works as expected and all servers are reachable by SSH. The parameter “Create shared SSH key” also needs to be enabled. That option will make ClusterControl to create a new SSH key pair on CMON node so this one can also connect to PXC nodes with passwordless SSH.
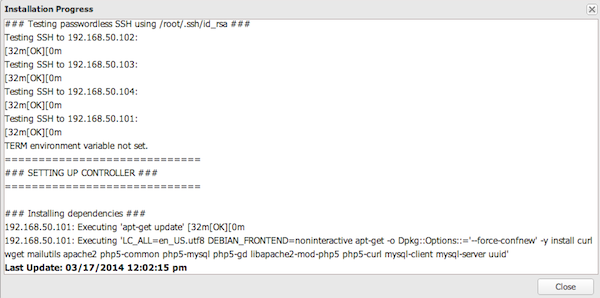
Now everything is prepared. We can proceed with the deployment. Just click on “Add cluster” and the installation process will start. While the installation is in progress you will see this notification:

Clicking on it we can see the progress of the deployment:
After some minutes our PXC is shown in the Percona ClusterControl UI:

Now we can monitor it, get alerts, clone, run backups and everything from the web interface. You can also add multiple clusters and create new ones.
About the Author
 Miguel Angel Nieto
Miguel joined Percona in October 2011. He has worked as a System Administrator for a Free Software consultant and in the supporting area of the biggest hosting company in Spain. His current focus is improving MySQL and helping the community of Free Software to grow.