
In my previous blog post, I showed how to deploy Percona Monitoring and Management (PMM) on Linode manually. It is pretty simple, but with a little coding it can be done even more easily using StackScripts
Here’s how:
1. Click on the “Add a Linode” and pick a Linode type you want to deploy.
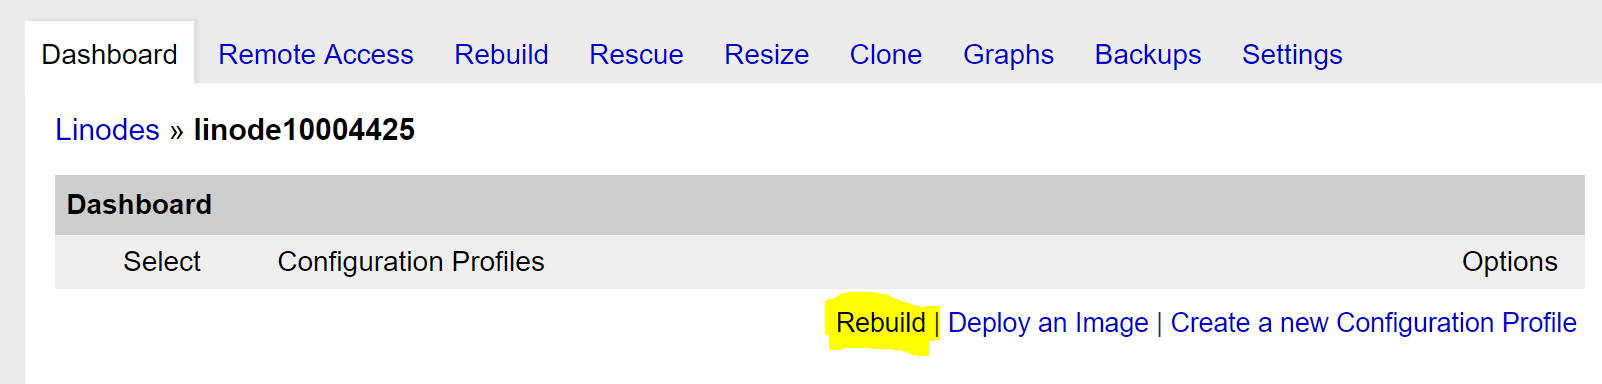
2. Click on the deployed Linode and then click on the “Rebuild” Link
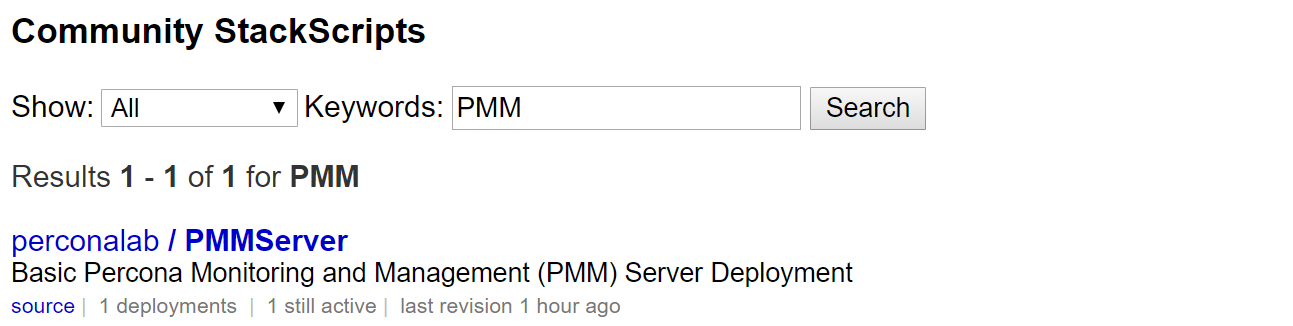
3. Click on Deploy Using StackScripts

4. On the resulting page search for “PMM” and pick PMMServer from PerconaLab.
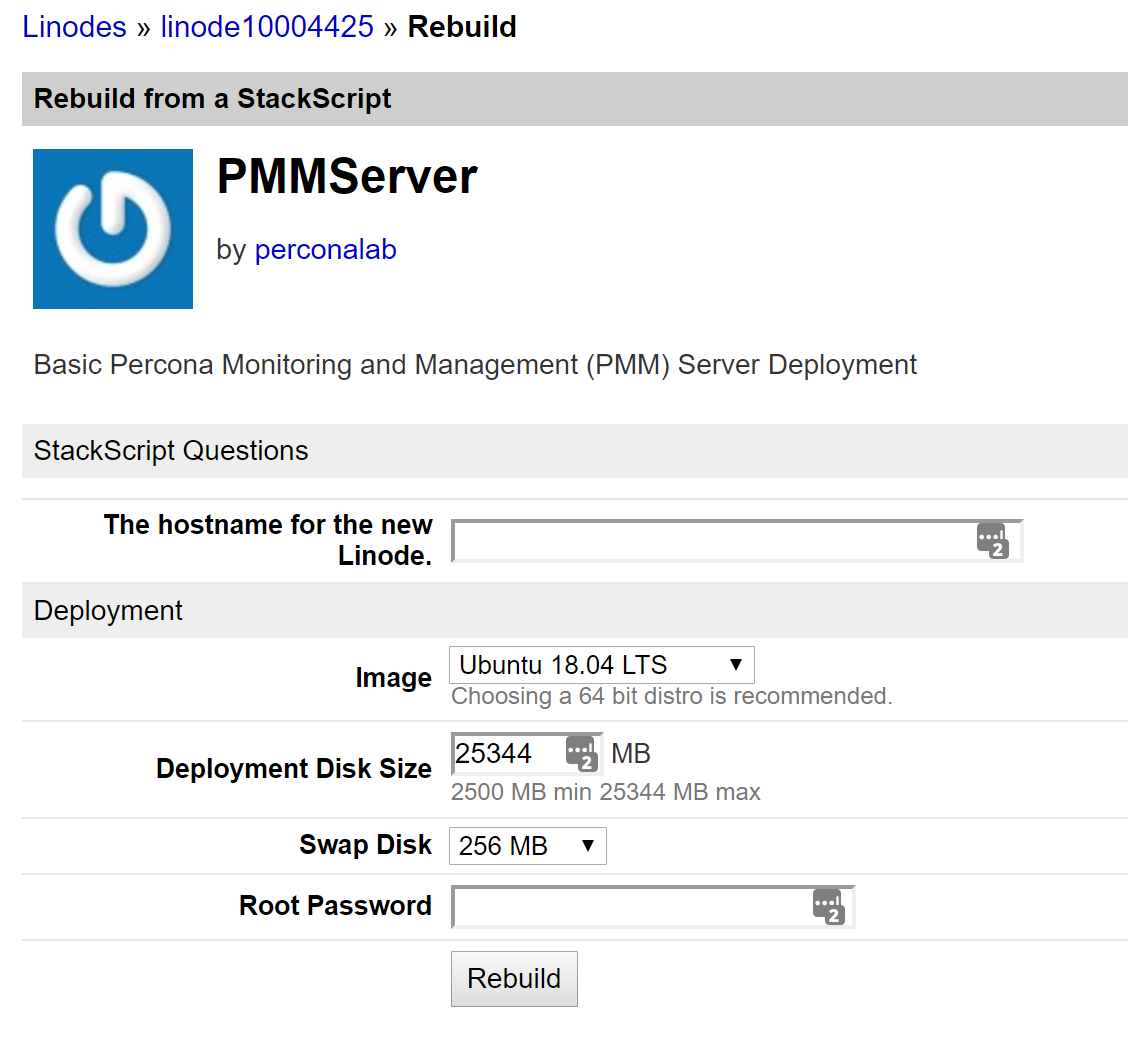
5. Provide the host name for new Linode, pick the root password and click on “Rebuild”
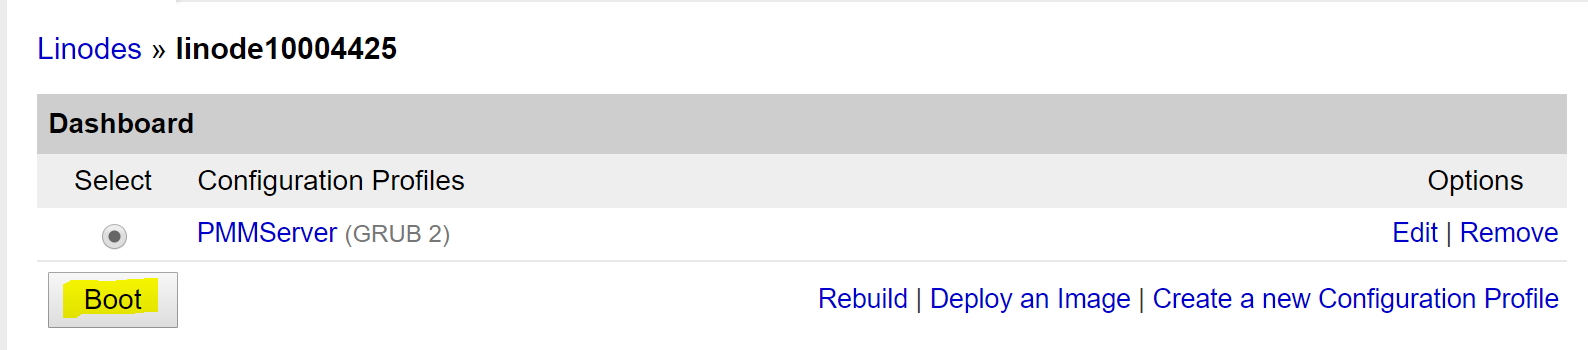
6. Boot the server.
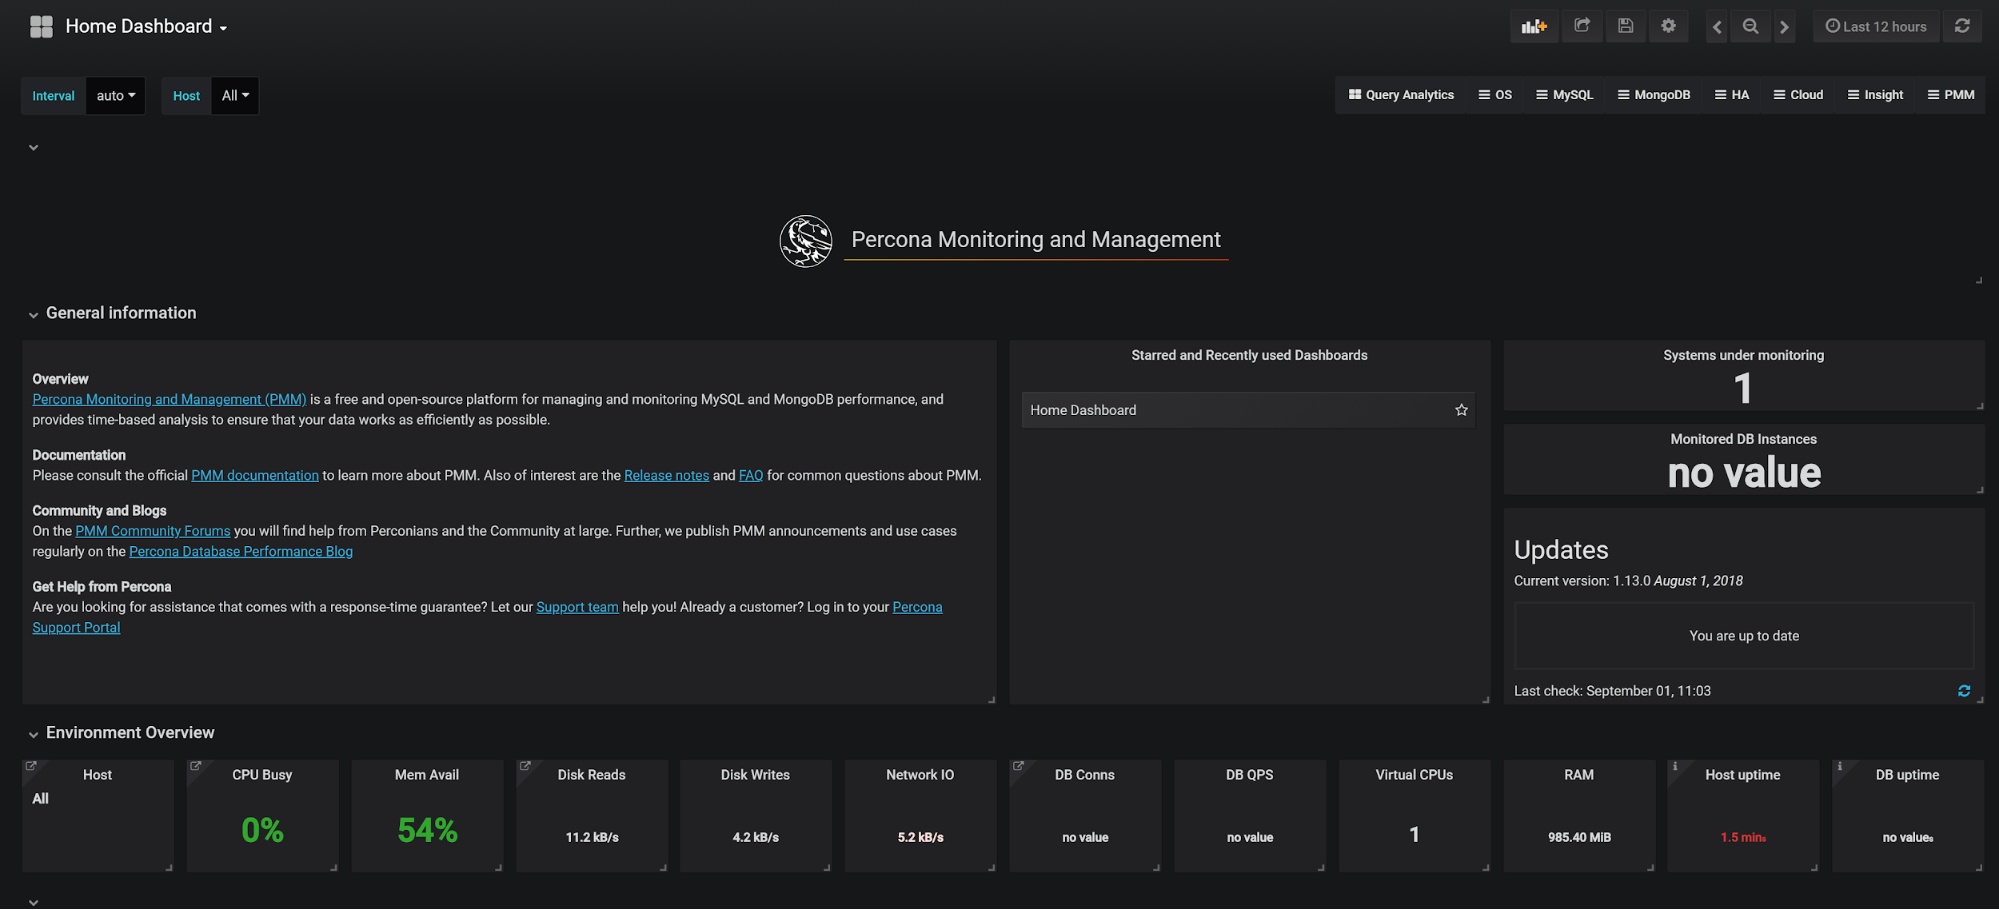
7. You’re done. Wait for about 5 minutes for the installation to complete, then you can see PMM interface by going to this Linode IP
If you think that a manual deployment with StackScripts is not much less hassle than doing it manually, you’re right. The real benefit comes with using Linode API for deployment.
There are multiple way to access this API, though for basic scripting I prefer the linode-cli tool for using the Linode API from the command line.
With linode-cli you can deploy your PMM Server on Linode using this one liner:
|
1 |
linode-cli linodes create --label pmm-test --root_pass MyRootPassword123 --stackscript_id 338458 --stackscript_data '{"hostname": "pmm-test"}' |
As you can see, with Linode StackScripts you can get going with Percona Monitoring and Management on Linode in no time, especially if you chose to use the Linode API.
Here’s an overview from the Percona Monitoring and Management manual on deploying PMM. If you are new to PMM and would like to know more, you will find lots of resources on this site including my webinar MySQL Troubleshooting and Performance Optimization with PMM.