
Here in Percona Support, we’re receiving several requests per day for help with Percona Cloud Tools installation steps.
So I decided to prepare a step-by-step example of the installation process with some comments based on experience. Percona Cloud Tools is a hosted service providing access to query performance insights for all MySQL uses. After a brief setup, you’ll unlock new information about your database and how to improve your applications. You can sign up to request access to the free beta, currently under way.
Go to the URL and sign up (or log-in)
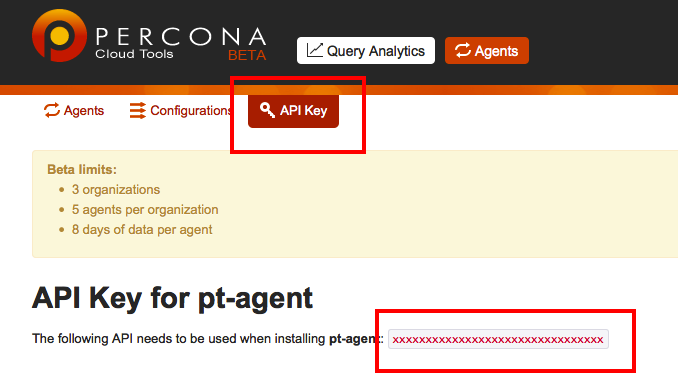
Copy your API key:
On this URL: API Key
Or by menu: Agents -> API Key
Download Percona-Toolkit:
https://www.percona.com/downloads/percona-toolkit/LATEST/
For example:
CentOS:
yum install https://www.percona.com/redir/downloads/percona-toolkit/LATEST/RPM/percona-toolkit-2.2.6-1.noarch.rpm
Ubuntu:
wget https://www.percona.com/redir/downloads/percona-toolkit/LATEST/deb/percona-toolkit_2.2.6_all.deb

dpkg -i percona-toolkit_2.2.6_all.deb
Run this command:
pt-agent --install --user={mysql username} --password={password} --api-key={API Key copied from web site}
Note: add there your username, password and API Key
You should see this:
|
1 2 3 4 5 6 7 8 9 10 11 12 13 14 15 16 17 18 19 20 21 22 23 24 |
============================================================================= pt-agent --install --user={user} --password={password} --api-key={api-key} Step 1 of 11: Verify the user is root: OK Step 2 of 11: Check Perl module dependencies: OK Step 3 of 11: Check for crontab: OK Step 4 of 11: Verify the API key: OK Step 5 of 11: Connect to MySQL: OK Step 6 of 11: Check if MySQL is a slave: NO Step 7 of 11: Create a MySQL user for the agent: OK Step 8 of 11: Initialize /etc/percona/agent/my.cnf: OK Step 9 of 11: Initialize /root/.pt-agent.conf: OK Step 10 of 11: Create the agent: OK Step 11 of 11: Run the agent: 2014-01-29T20:12:17 INFO Starting agent pt-agent has daemonized and is running as PID 13506: --lib /var/lib/pt-agent --log /var/log/pt-agent.log --pid /var/run/pt-agent.pid These values can change if a different configuration is received. OK INSTALLATION COMPLETE The agent has been installed and started, but it is not running any services yet. Enable services for the agent. ============================================================================= |
Agent is installed
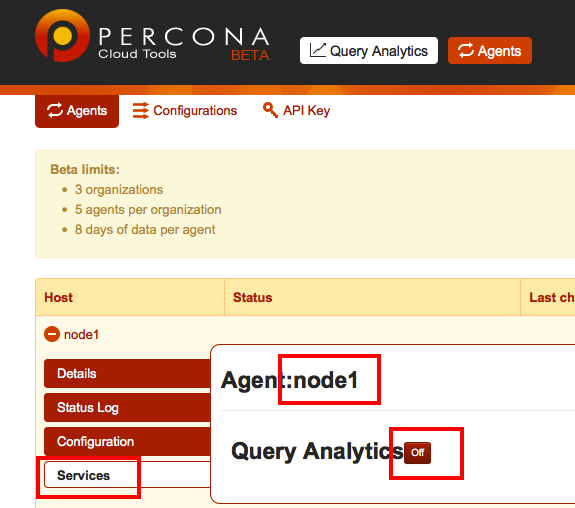
Goto: agents and select your newly created agent
Then enable Service:
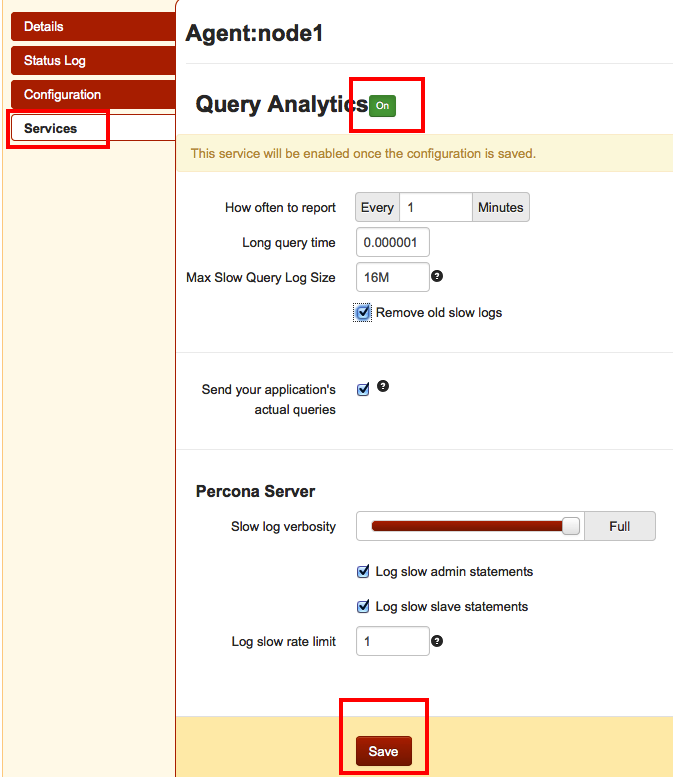
Done!
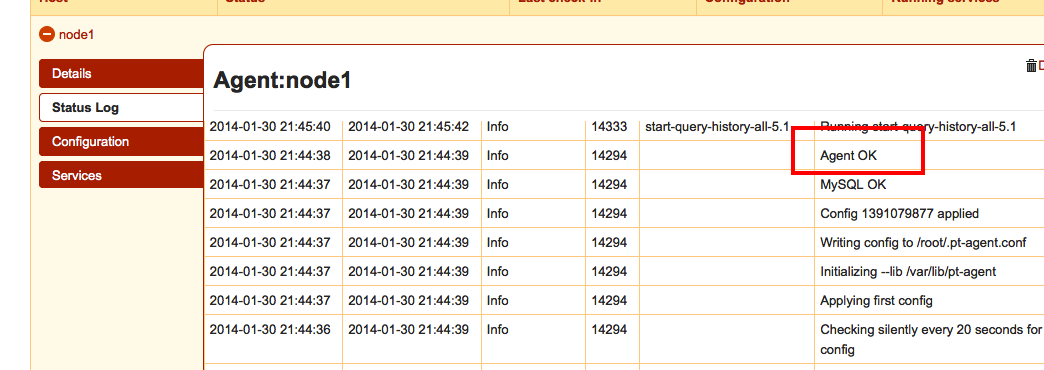
Now wait a few min, check Status Log: Agents -> select agent -> Status Log
You should see there: “Agent OK”
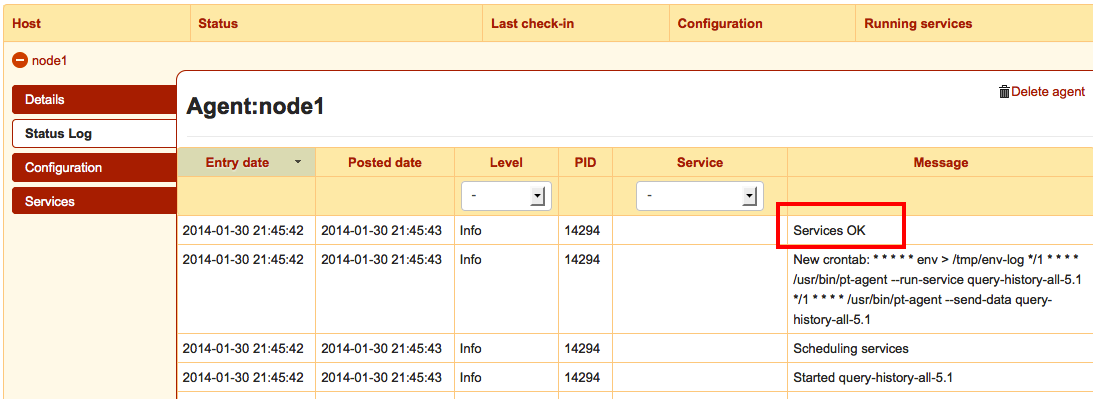
Now wait (~3 min) until pt-agent will add jobs to crontab.
You should see there: “Services OK”
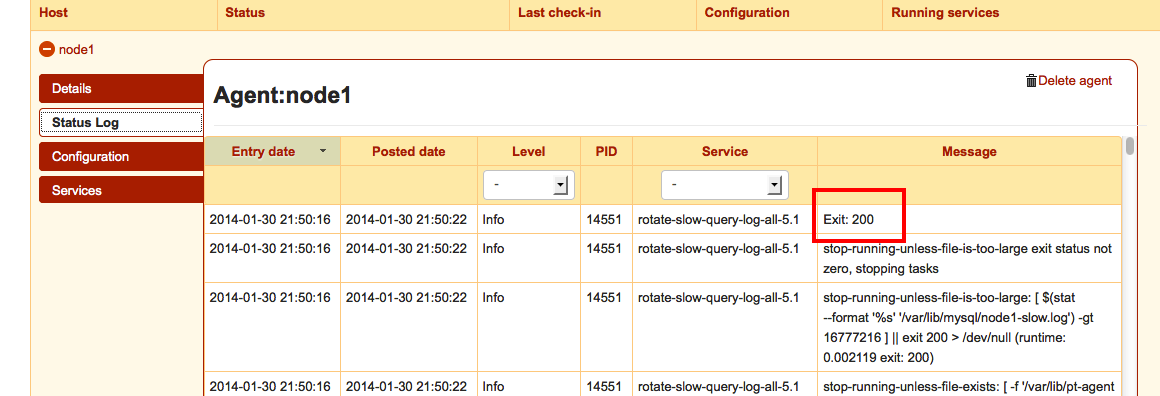
Then run some slow queries and wait (~3-5 min).
If everything is ok then you should see there “Exit: 200”
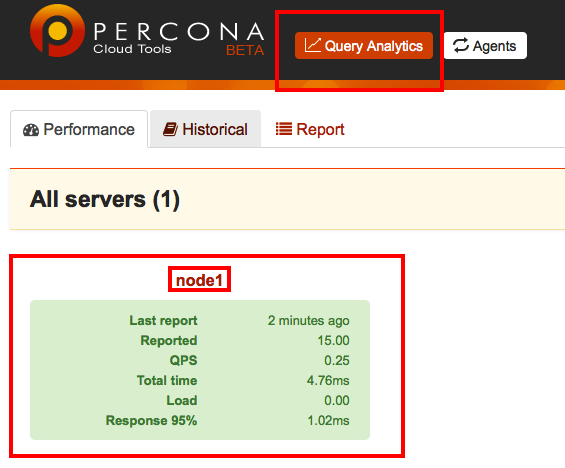
Now check Query Analytics.
There is a “Help Me” button at the bottom of the page so you can ask for Support if you have any questions and our Support team will gladly help you.

Enjoy!
Resources
RELATED POSTS


Michael,
Great summary!
Thanks!
Thanks everyone for feedbacks!
Does the agent support using a proxy? I don’t see related in pt-agent