
Personal Projects with the Internet of Things
So you want to do a personal project with the Internet of Things (maybe a home automation or metrics collection or something else)? In this blog post I will tell about my recent experience with this. I will give a talk on this topic at Oracle OpenWord 2015 (Tuesday, Oct 27, 6:15 p.m., Moscone South, 274).
Here is what I did: I was looking for the best place to plant some trees in my backyard. I learned that I need to know how much sun I have in the backyard before planting (some trees need full sun, while others need partial sun or shade). So I needed to measure the sunlight in different spots.
The “old” way of doing it was to use Arduino or Raspberry Pi. (Of course this can be done by just manually checking the spot every hour and writing the measurements on a piece of paper, but this was out of the question.) Both solutions require additional components (i.e. Wi-Fi module for Arduino or connecting Raspberry Pi to Arduino).
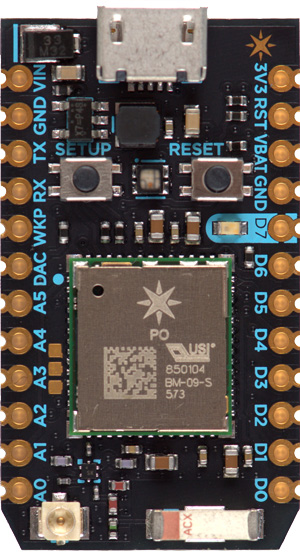
As the Internet of Things is getting more and more popular for personal projects, there are a number of new low-priced and easy-to-use hardware solutions. I decided to use a Particle Photon board.
Major advantages:
100% Cloud
This is what my architecture looks like:
The whole system is 100% in the cloud; it is sending all events to the Particle’s server and I’m receiving those events from yet another server in AWS. Thus this system only needs: a) Particle Photon and b) a Wi-Fi router/access point. I can then pass the assembled Photon board to my friends and they can just connect it to another Wi-Fi router (this can be done with the phone app).
Fully Assembled Project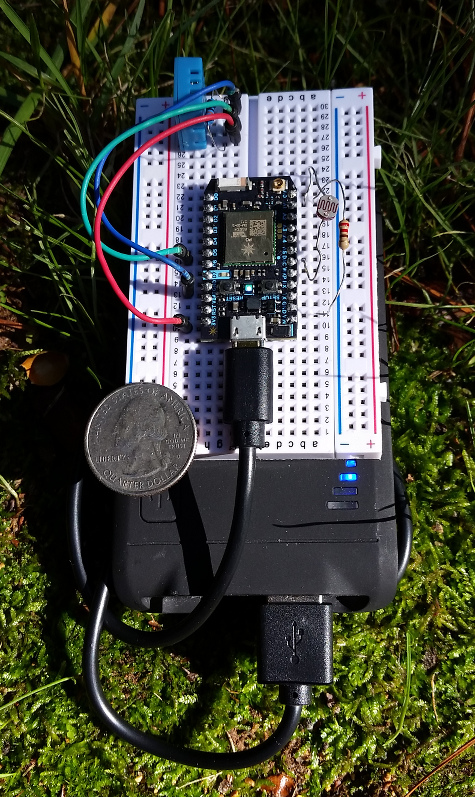
The system runs on a standard USB battery (the black “thing” below the board). I placed a quarter on the board to demonstrate the size.
I followed the instructions from the open home automation blog post to attach a DHT11 sensor for temperature and humidity measurements.
Particle Build provides the Web IDE; from there I can add those lines to publish my events:
... Spark.publish("temperature", String(temperature)); Spark.publish("humidity", String(humidity)); Spark.publish("light", String(light)); ...
Now I will need to subscribe to the events and load the readings to MySQL. I used the Particle JavaScript API to do that; here is my simple code (I did not insert a date but used MySQL’s timestamp. You can use the event’s date instead, which will probably be better).
|
1 2 3 4 5 6 7 8 9 10 11 12 13 14 15 16 17 18 19 20 21 22 23 24 25 26 27 28 29 30 31 32 |
console.log("Starting..."); var spark = require('spark'); spark.login({accessToken: '<place your token here>'}); // MySQL Connection var mysql = require('mysql'); var connection = mysql.createConnection({ host : 'localhost', user : 'photon', password : 'photon', database : 'particle' }); connection.connect(function(err) { if (err) { console.error('error connecting: ' + err.stack); return; } console.log('connected as id ' + connection.threadId); }); spark.getEventStream(false, 'mine', function(data) { console.log("Event: " + data.name + ':' + data.data); var query = connection.query('INSERT INTO cloud_data (name, data) values (?, ?)', [data.name, data.data], function(err, result) { if (err) { console.log('Error in ' + query.sql + err + JSON.stringify(result)); } }); console.log(query.sql); }); |
That is it. Here is the listing:
|
1 2 3 4 5 6 7 8 9 |
$ nodejs particle_mysql.js Starting... connected as id 73 INSERT INTO cloud_data (name, data) values ('spark/status', 'online') Event: light:164 INSERT INTO cloud_data (name, data) values ('light', '164') Event: light:165 INSERT INTO cloud_data (name, data) values ('light', '165') Event: light:162 |
Conclusion
As the Internet of Things gets more and more popular, it is also becoming extremely easy to do a home project with it. The Particle Photon is a great option. Other options include:


Take a look at the Sparkfun “Thing” too. https://www.sparkfun.com/products/13231 I have one monitoring the temperatures of my freezers. Very capable little board, programmable with the arduino environment, a touch cheaper than the photon, and has a built in charge controller and connector that would take the place of your usb power pack.
Jeff, thank you for the update. Yes, “Thing” looks very interesting and it is based on the same ESP8266. The only thing it is missing (if I’m not mistaken) is the over-the-air code flush.
Alexander, this is a great project to get messing about with the Internet of Things. I think it is time for me to get playing around with these boards too.
Hi
I can contact you directly