
 For testing purposes, especially if you’re working on a project that uses any database technology to store information, you may need data to try out your project. In that case, you have two options:
Through this blog post, you will learn how to generate test data for MongoDB using Faker.
Make sure all the dependencies are installed before creating the Python script that will generate the data for your project.
You can create a requirements.txt file with the following content:
|
1 2 3 4 |
pandas pymongo tqdm faker |
Once you have created this file, run the following command:
|
1 |
pip install -r requirements.txt |
Or if you’re using Anaconda, create an environment.yml file:
|
1 2 3 4 5 6 7 |
name: percona dependencies: - python=3.10 - pandas - pymongo - tqdm - faker |
You can change the Python version as this script has been proven to work with these versions of Python: 3.7, 3.8, 3.9, 3.10, and 3.11.
Run the following statement to configure the project environment:
|
1 |
conda env create -f environment.yml |
Faker is a Python library that can be used to generate fake data through properties defined in the package.
|
1 2 3 4 5 |
from faker import Faker fake = Faker() for _ in range(10): print(fake.name()) |
The above code will print ten names, and on each call to method name(), it will produce a random value. The name() is a property of the generator. Every property of this library is called a fake. and there are many of them packaged in providers.
Some providers and properties available in the Faker library include:
You can find more information on bundled and community providers in the documentation.
After knowing Faker and its properties, a modules directory needs to be created, and inside the directory, we will create a module named dataframe.py. This module will be imported later into our main script, and this is where we define the method that will generate the data.
|
1 2 3 4 |
from multiprocessing import cpu_count import pandas as pd from tqdm import tqdm from faker import Faker |
Multiprocessing is implemented for optimizing the execution time of the script, but this will be explained later. First, you need to import the required libraries:
|
1 2 |
fake = Faker() num_cores = cpu_count() - 1 |
Faker() creates and initializes a faker generator, which can generate data by accessing the properties.
num_cores is a variable that stores the value returned after calling the cpu_count() method.
|
1 2 3 4 5 6 7 8 9 10 11 12 13 |
def create_dataframe(arg): x = int(60000/num_cores) data = pd.DataFrame() for i in tqdm(range(x), desc='Creating DataFrame'): data.loc[i, 'first_name'] = fake.first_name() data.loc[i, 'last_name'] = fake.last_name() data.loc[i, 'job'] = fake.job() data.loc[i, 'company'] = fake.company() data.loc[i, 'address'] = fake.address() data.loc[i, 'city'] = fake.city() data.loc[i, 'country'] = fake.country() data.loc[i, 'email'] = fake.email() return data |
Then we define the create_dataframe() function, where:
The DataFrame that is created after calling this function will have the following columns:
|
1 2 3 4 5 6 7 8 9 10 |
# Column Non-Null Count Dtype --- ------ -------------- ----- 0 first_name 60000 non-null object 1 last_name 60000 non-null object 2 job 60000 non-null object 3 company 60000 non-null object 4 address 60000 non-null object 5 country 60000 non-null object 6 city 60000 non-null object 7 email 60000 non-null object |
Before inserting the data previously generated with Faker, we need to establish a connection to the database, and for doing this the PyMongo library will be used.
|
1 2 3 4 |
from pymongo import MongoClient uri = "mongodb://user:password@localhost:27017/" client = MongoClient(uri) |
From PyMongo, we import the MongoClient() method.
Don’t forget to replace user, password, localhost, and port (27017) with your authentication details, and save this code in the modules directory and name it as base.py.
Multiprocessing is a Python module that can be used to take advantage of the CPU cores available in the computer where the script is running. In Python, single-CPU use is caused by the global interpreter lock, which allows only one thread to carry the Python interpreter at any given time, for more information see this blog post.
Imagine that you’re generating 60,000 records, running the script in a single core will take more time than you could expect, since each record is generated one by one within the loop. By implementing multiprocessing, the whole process is divided by the number of cores, so that if your CPU has 16 cores, every core will generate 4,000 records, and this is because only 15 cores will be used as we need to leave one available for avoiding freezing the computer.
To understand better how to implement multiprocessing in Python, I recommend the following tutorials:
All the required modules are now ready to be imported into the main script so it’s time to create the mongodb.py script. First, import the required libraries:
|
1 2 3 |
from multiprocessing import Pool from multiprocessing import cpu_count import pandas as pd |
From multiprocessing, Pool() and cpu_count() are required. The Python Multiprocessing Pool class allows you to create and manage process pools in Python.
Then, import the modules previously created:
|
1 2 |
from modules.dataframe import create_dataframe from modules.base import client |
Now we create the multiprocessing pool configured to use all available CPU cores minus one. Each core will call the create_dataframe() function and create a DataFrame with 4,000 records, and after each call to the function has finished, all the DataFrames created will be concatenated into a single one.
|
1 2 3 4 5 6 7 8 |
if __name__ == "__main__": num_cores = cpu_count() - 1 with Pool() as pool: data = pd.concat(pool.map(create_dataframe, range(num_cores))) data_dict = data.to_dict('records') db = client["company"] collection = db["employees"] collection.insert_many(data_dict) |
After logging into the MongoDB server, we get the database and the collection where the data will be stored.
And finally, we will insert the DataFrame into MongoDB by calling the insert_many() method. All the data will be stored in a collection named employees.
Run the following statement to populate the database:
|
1 |
python mongodb.py |
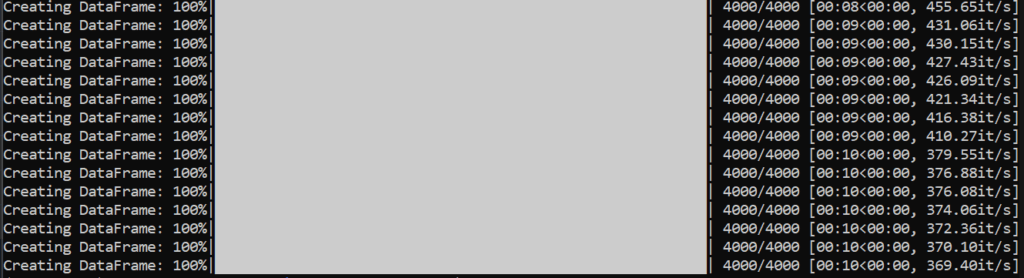
It will take just a few seconds to generate the DataFrame with the 60,000 records, and that’s why multiprocessing was implemented.
Once the script finishes, you can check the data in the database.
|
1 2 |
use company; db.employees.count() |
The count() function returns the number of records in the employees table.
|
1 |
60000 |
Or you can display the records in the employees table:
|
1 |
db.employees.find().pretty() |
|
1 2 3 4 5 6 7 8 9 10 11 |
{ "_id" : ObjectId("6363ceeeda5c972cabf558b4"), "first_name" : "Sherri", "last_name" : "Phelps", "job" : "Science writer", "company" : "House Inc", "address" : "06298 Mejia Streets Suite 742nRobertland, WY 98585", "city" : "Thomasview", "country" : "Cote d'Ivoire", } |
The code shown in this blog post can be found on my GitHub account in the data-generator repository.
Resources
RELATED POSTS